🌍 Introduction
Raising your own crickets might sound unusual but it’s actually one of the most sustainable, affordable, and rewarding ways to produce high-quality protein right at home.
As the demand for edible insects and sustainable foods grows, home cricket farming is becoming a fun and eco-conscious hobby that helps reduce your carbon footprint while giving you access to fresh, nutritious ingredients.
In this guide, we’ll show you how to raise crickets at home, from setting up their habitat to feeding, caring, and harvesting them safely.
🏠 1. Why Raise Crickets at Home?
Before diving in, let’s look at why cricket farming is worth your time:
- ✅ Sustainable Protein: Crickets require 12x less feed than cattle and 2000x less water.
- 🌱 Eco-Friendly: They produce minimal greenhouse gases and can thrive in small spaces.
- 💰 Cost-Effective: You can start a basic setup for less than $50.
- 🍽️ Nutrient-Rich: Crickets contain over 60% protein, plus iron, calcium, and B12.

🧰 2. What You’ll Need
To start your mini cricket farm, prepare the following items:
- A plastic or glass container (minimum 60x40x30 cm)
- Ventilated lid (for airflow)
- Egg cartons or cardboard rolls (for hiding and climbing)
- Heating pad or lamp (keep temperature around 28–32°C / 82–90°F)
- Water source (moist sponge or water gel)
- Feed (oats, grains, vegetables, or specialized cricket food)
💡 Pro Tip: Keep humidity between 50–70% too dry, and crickets will dehydrate; too wet, and mold may form.

🐣 3. The Breeding Process
Once your setup is ready:
- Get your starter colony (around 50–100 crickets).
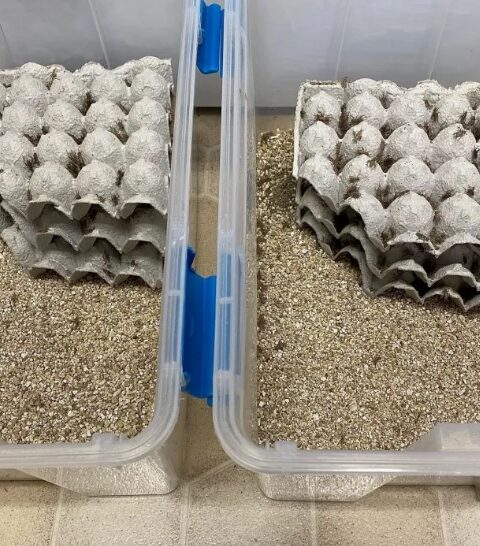
- Provide a shallow container with moist soil or sand for females to lay eggs.
- After a few days, remove the egg container and place it in a warm, humid area for incubation.
- Eggs hatch in about 7–10 days welcome your baby crickets!
- Feed and care for them daily, ensuring clean water and dry feed.
🕒 Lifespan tip: Crickets grow from egg to adult in 6–8 weeks. You can maintain a continuous cycle by rotating your breeding containers.

🌾 4. Feeding & Maintenance
Crickets thrive on grains, fruit, and vegetables.
You can feed them:
- Oatmeal
- Carrots
- Apples
- Leafy greens
Avoid moldy or wet foods always keep their environment dry and clean.
Replace food every two days and remove waste to prevent odor.
🍽️ 5. Harvesting Your Crickets
When your crickets are fully grown (around 6–8 weeks), you can:
- Use them whole (after drying or roasting), or
- Grind them into cricket flour for recipes like cookies, pancakes, and protein snacks.
To harvest humanely, place them in the freezer for 30 minutes it’s quick and painless.

⚖️ 6. Is It Legal to Raise Crickets?
In most countries, raising crickets for personal consumption is legal.
If you plan to sell cricket flour or food products, check your local food safety regulations first.
In the EU, crickets are approved as a novel food, meaning they meet strict safety standards.
🌱 7. The Bigger Picture: Sustainability
Cricket farming is more than just a trend it’s a key part of the global shift toward sustainable food sources.
By raising crickets at home, you’re:
- Reducing waste
- Supporting circular agriculture
- Contributing to a greener food future
Every small farm counts.

📢 Call to Action
Curious about what to make with your home-grown crickets?
Try our Chocolate Chip Cookies with Cricket Flour or check out how cricket flour is transforming modern baking!